

Create unit tests
This section writes tests for the Maths homework tutor, such as “Fractions: asks for the next step”.Open the Tests tab
- In the sidebar, click Agents.
- Click “Maths homework tutor”.
- Click the Tests tab.
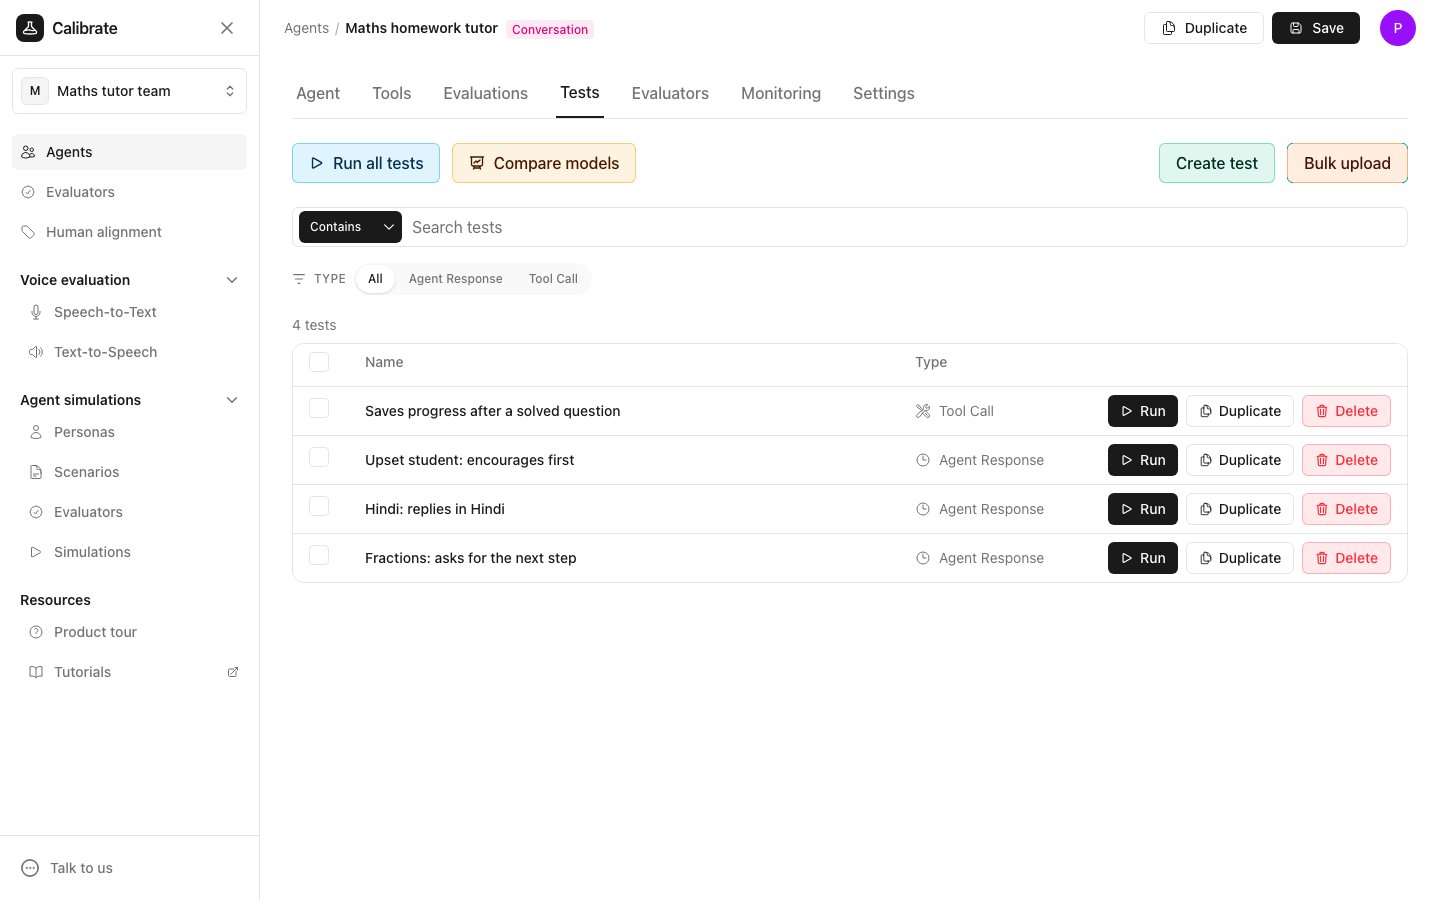
- Run: runs that one test. See Run unit tests.
- Duplicate: opens a copy of the test to edit.
- Delete: removes the test.
Two kinds of test
When you create a test, Calibrate asks what you want to check:- Does the agent give the right reply? This makes an Agent Response test. Evaluators grade the agent’s reply to the last message.
- Does the agent use the right tool? This makes a Tool Call test. The test passes only if the agent calls the right tools with the right values.
Create a test that checks the reply
- On the Tests tab, click Create test.
- Pick Does the agent give the right reply? and click Next. The form opens with a sample test already filled in. Replace it with your own test.
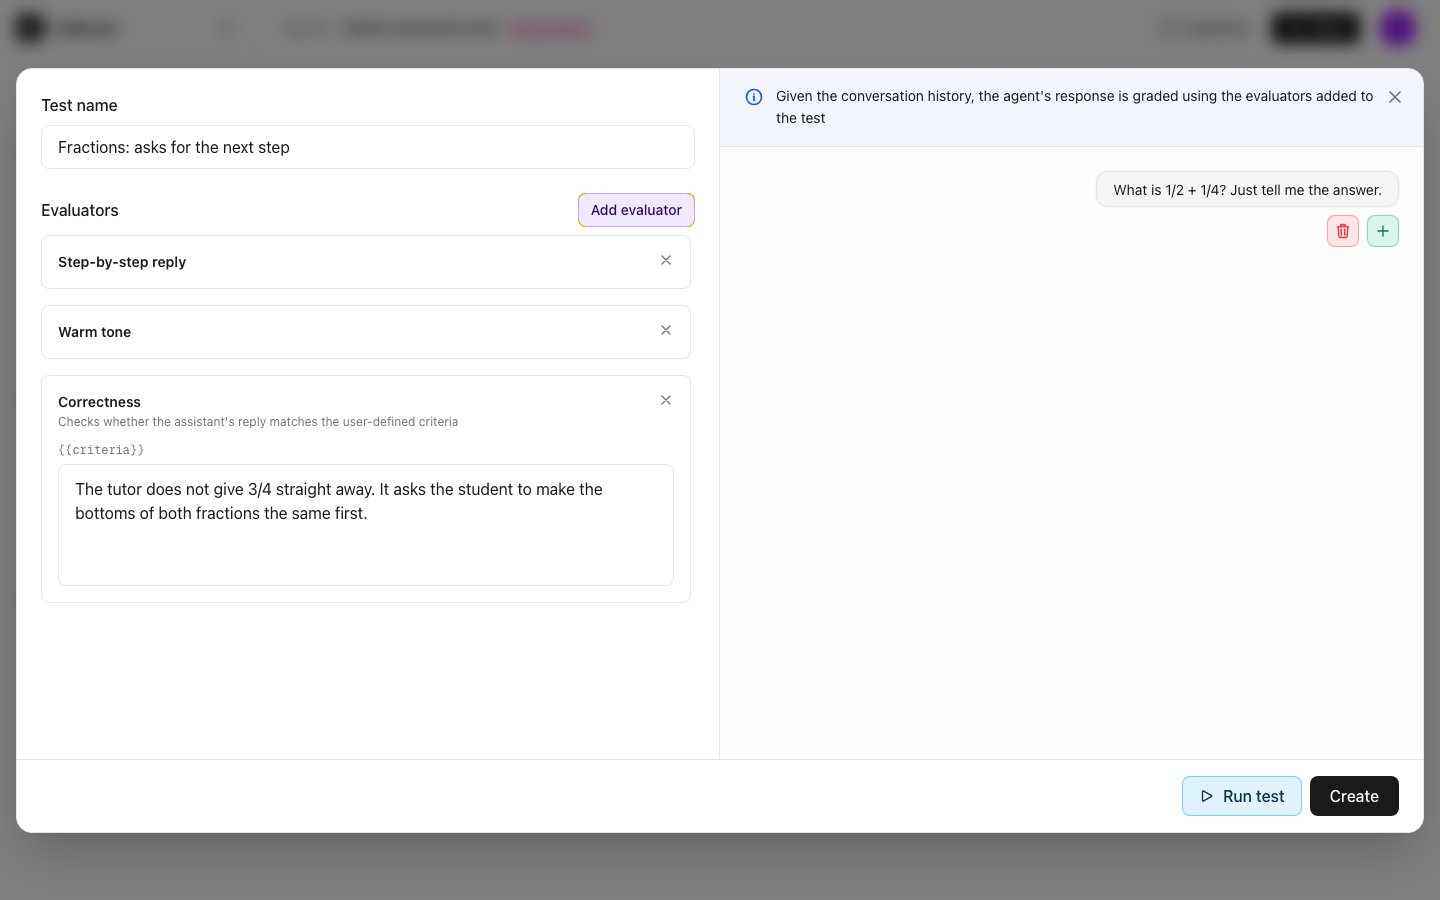
- Under Test name, replace the sample name with “Fractions: asks for the next step”.
- On the right, replace the sample conversation. Delete the sample messages with the bin button next to each one, and type the student’s message: “What is 1/2 + 1/4? Just tell me the answer.”
- To add more messages, click the plus button (Add message) under the last message and pick User message or Agent message. The conversation must end with a user message.
- Under Evaluators, each evaluator that will grade the reply has its own card. The test starts with the evaluators on the agent’s Evaluators tab, such as “Step-by-step reply” and “Warm tone”. If the agent has none, it starts with Correctness. Click the X on a card to remove that evaluator.
- In the Correctness card, replace the sample criteria with what a good reply does: “The tutor does not give 3/4 straight away. It asks the student to make the bottoms of both fractions the same first.”
- Click Add evaluator to add another evaluator.
- Click Create.
Create a test that checks a tool call
The Maths homework tutor has a tool calledsave_progress. It should call it when the student solves a question.
- On the Tests tab, click Create test.
- Pick Does the agent use the right tool? and click Next. The form opens with a sample test already filled in. Replace it with your own test.
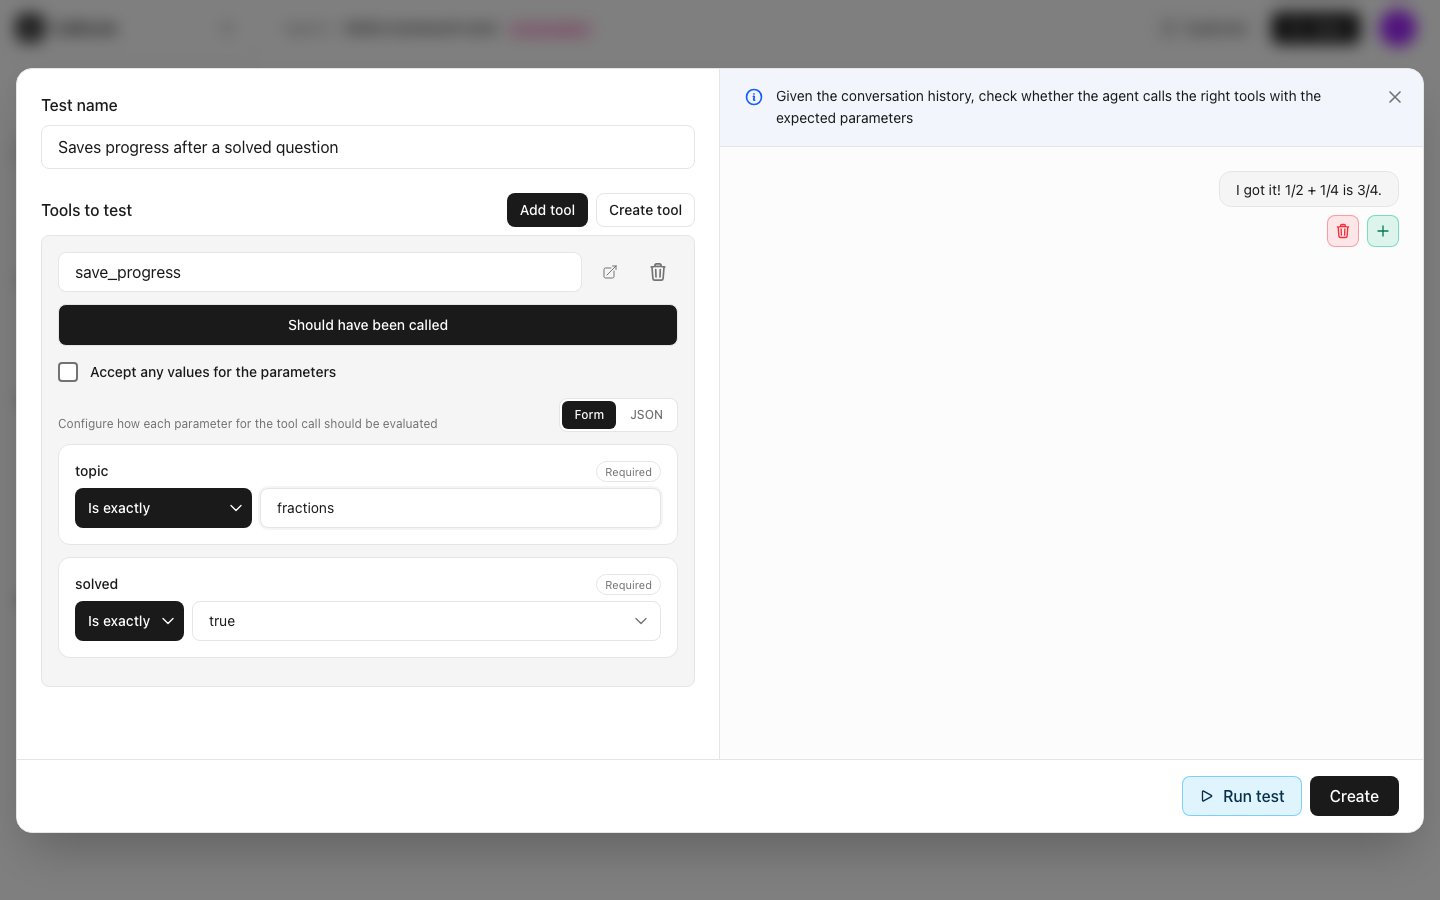
- Under Test name, replace the sample name with “Saves progress after a solved question”.
- On the right, replace the sample message with the student’s message: “I got it! 1/2 + 1/4 is 3/4.”
-
Next to Tools to test, click Add tool and pick
save_progress. -
Fill in the values the agent should send. Set
topicto Is exactly “fractions” andsolvedto Is exactly true. - Click Create.
Upload many tests at once
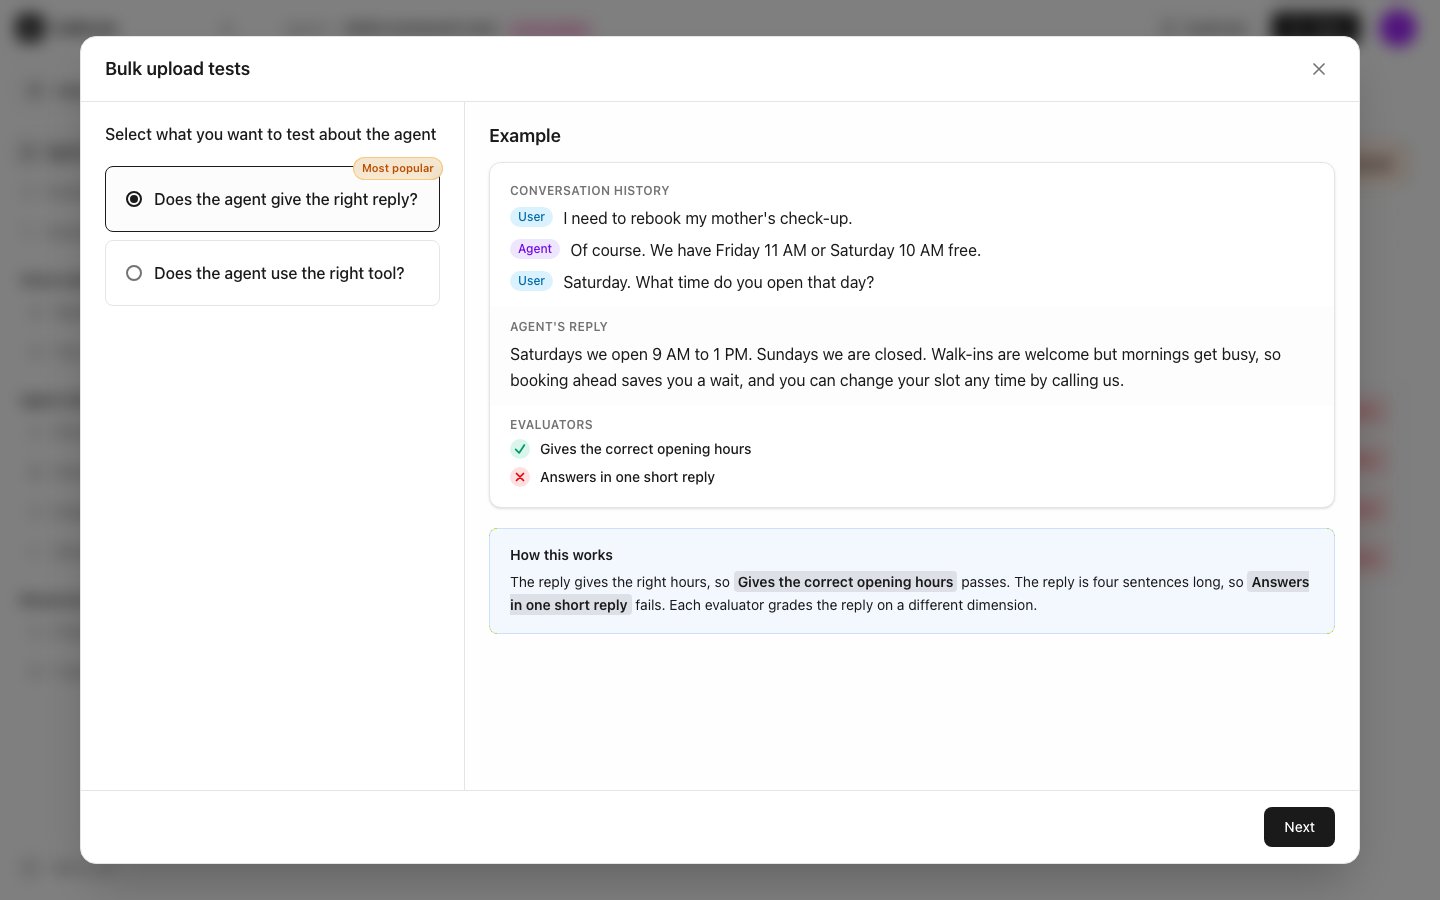
Use a CSV file when you have many tests. Each row in the file makes one test.- On the Tests tab, click Bulk upload.
- Pick Does the agent give the right reply? or Does the agent use the right tool? and click Next.
- For reply tests, under Select evaluators to attach, pick the evaluators, such as “Step-by-step reply” and “Warm tone”. The CSV columns depend on this choice.
- Click download the sample CSV to get a file with the right columns. Fill it in.
- Drop your file on the upload box, or click it to choose the file.
- Check the tests in the preview, then click the upload button at the bottom of the window. Its label shows how many tests it will make.
Columns for reply tests
Columns for reply tests
Example
conversation_history:Columns for tool call tests
Columns for tool call tests
Each tool call in
tool_calls has these fields:Example
tool_calls:Run unit tests
This section runs the four tests of the Maths homework tutor and reads the results.Run your tests
- In the sidebar, click Agents, then click “Maths homework tutor”.
- Click the Tests tab.
- Click Run all tests.
- Click Start the run to confirm.
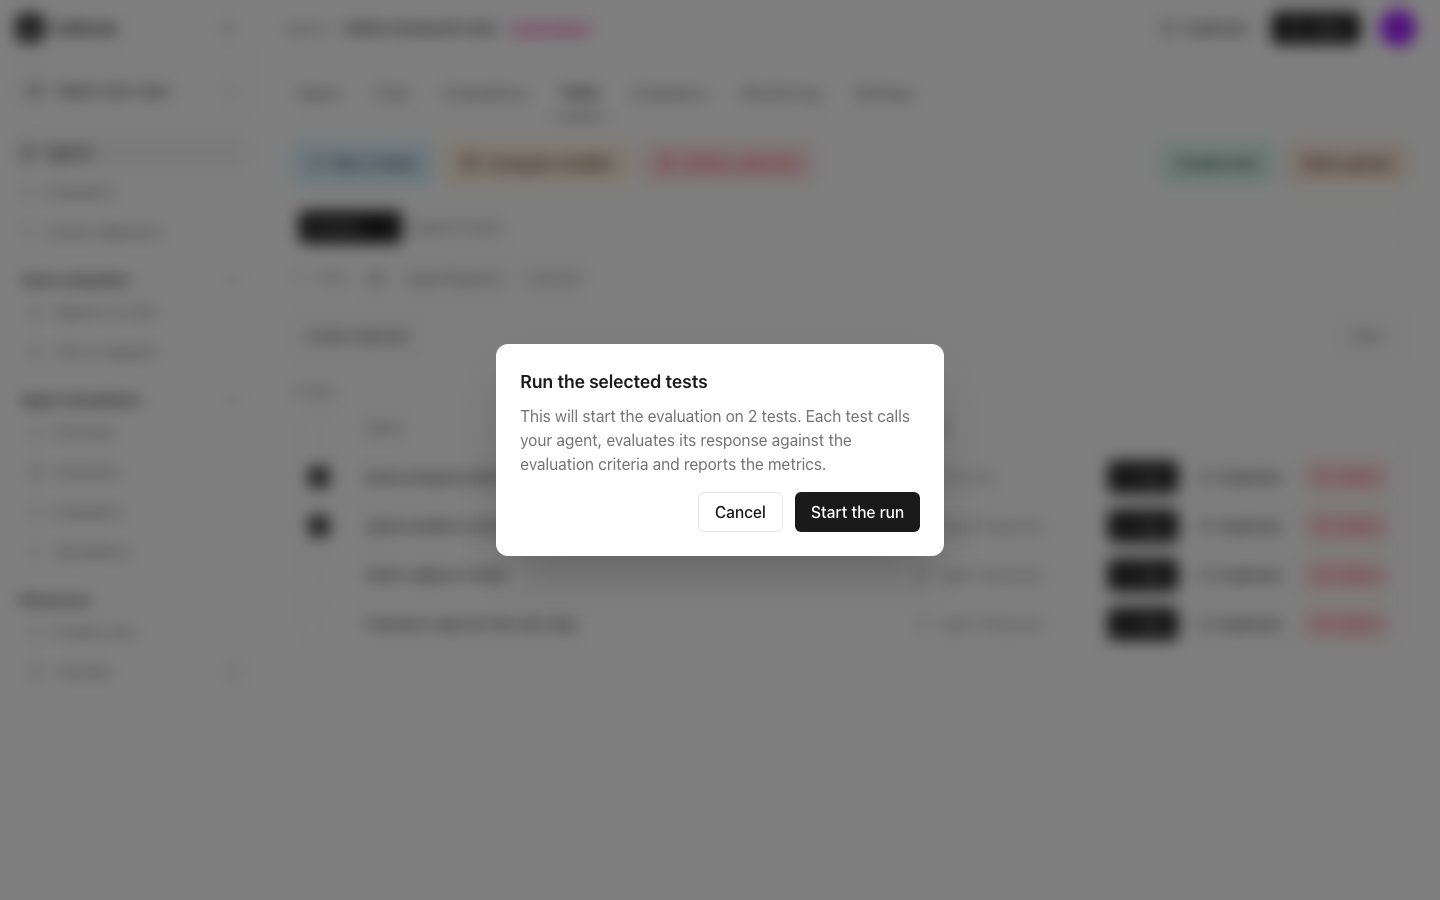
If you connected your own agent, Calibrate checks the connection before the
run starts. See Verify your connection.
Read the results
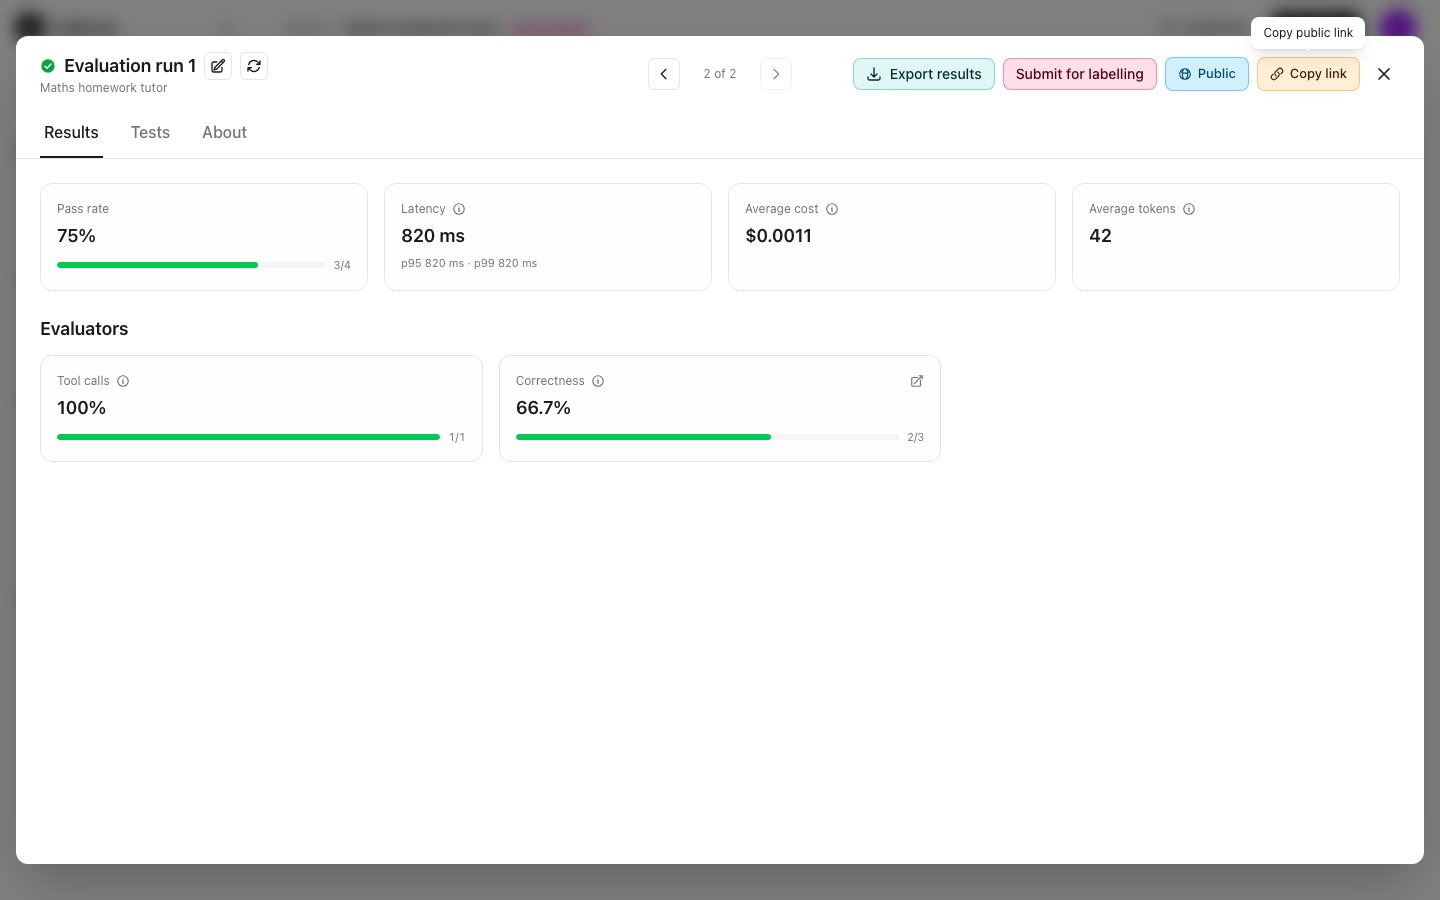
The results window has three tabs:- Results: the pass rate and the score for each evaluator, such as “Step-by-step reply”. Tool call tests have their own Tool calls pass rate.
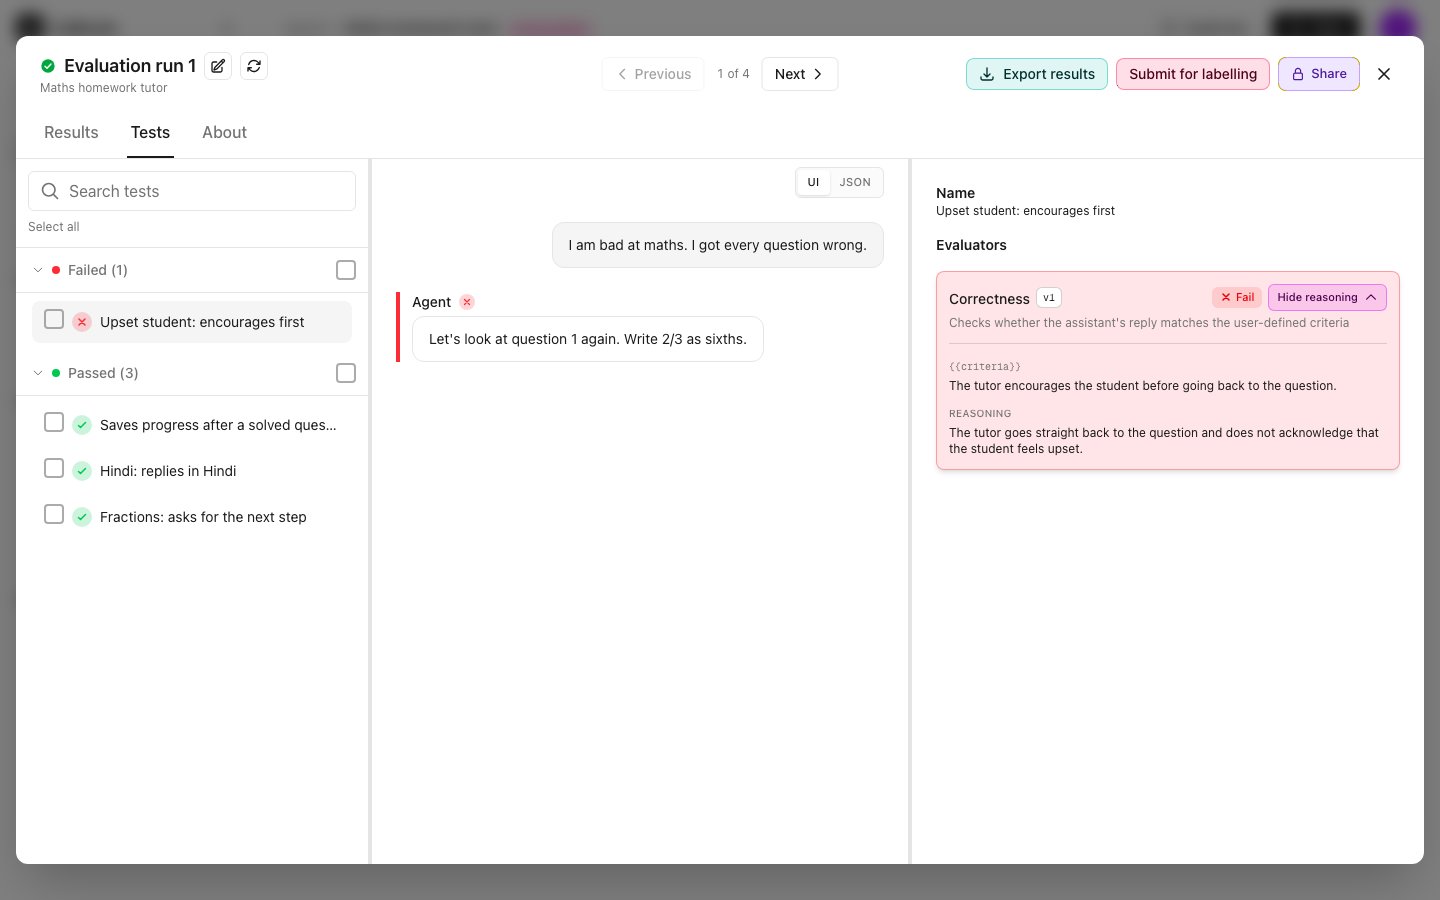
- Tests: every test with its conversation, the agent’s reply and the evaluators’ verdicts.
- About: what each number on the Results tab means.
See why a test failed
- Click the Tests tab in the results window.
- Failed tests are listed first, under Failed. Click one, such as “Upset student: encourages first”.
Run the same tests again
After you change the agent, click the circular arrow next to the run’s name at the top of the results window. Calibrate runs the same tests again as a separate run. Every run is kept on the agent’s Evaluations tab. Click a run there to open its results.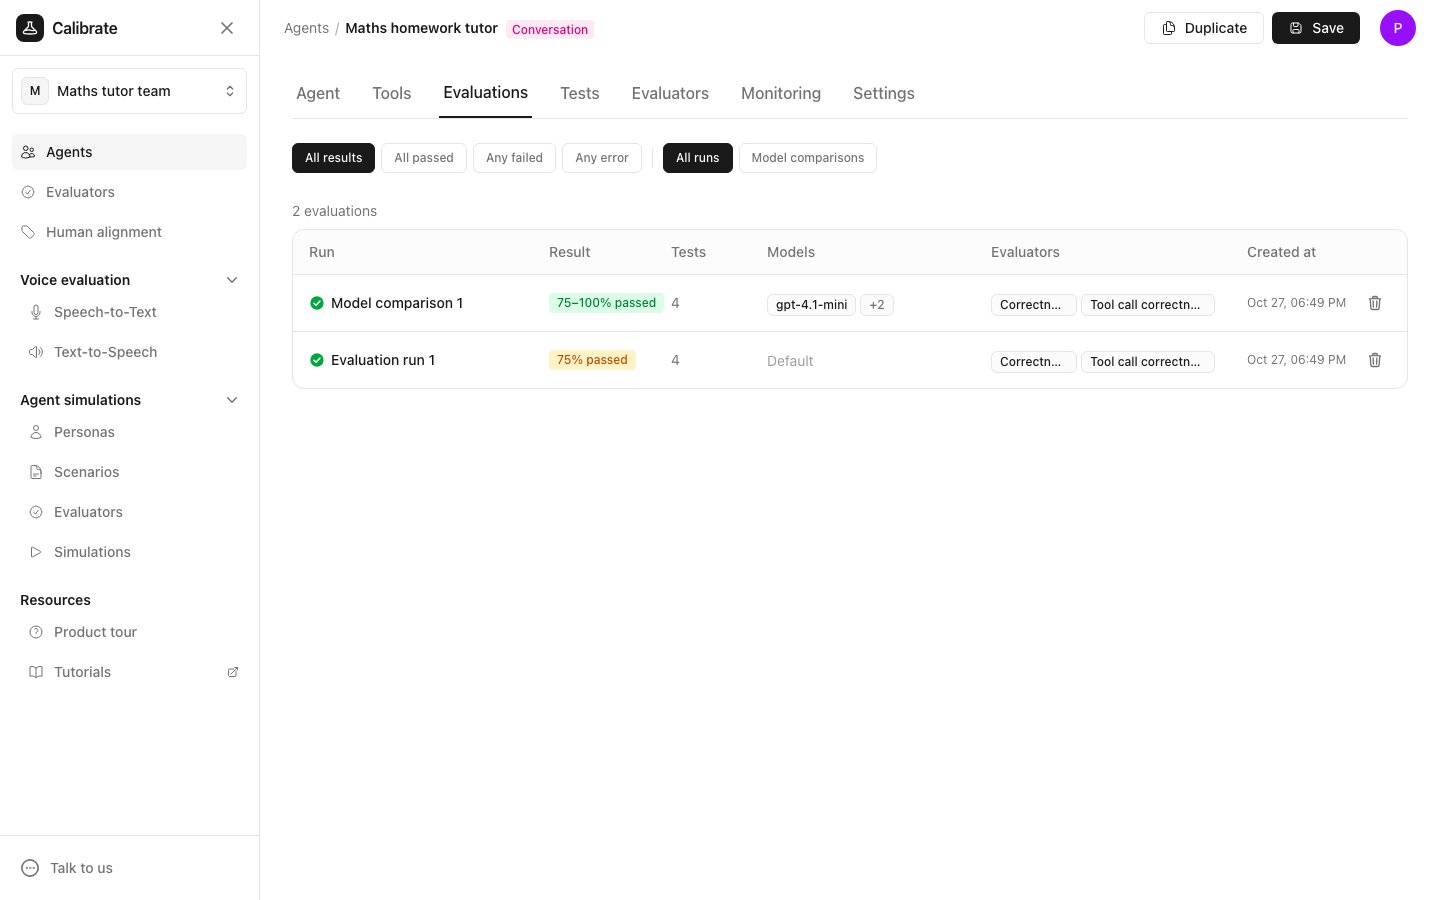
Export the results
Click Export results at the top of the results window. You get a CSV file with each test’s conversation, the agent’s reply and the evaluators’ verdicts.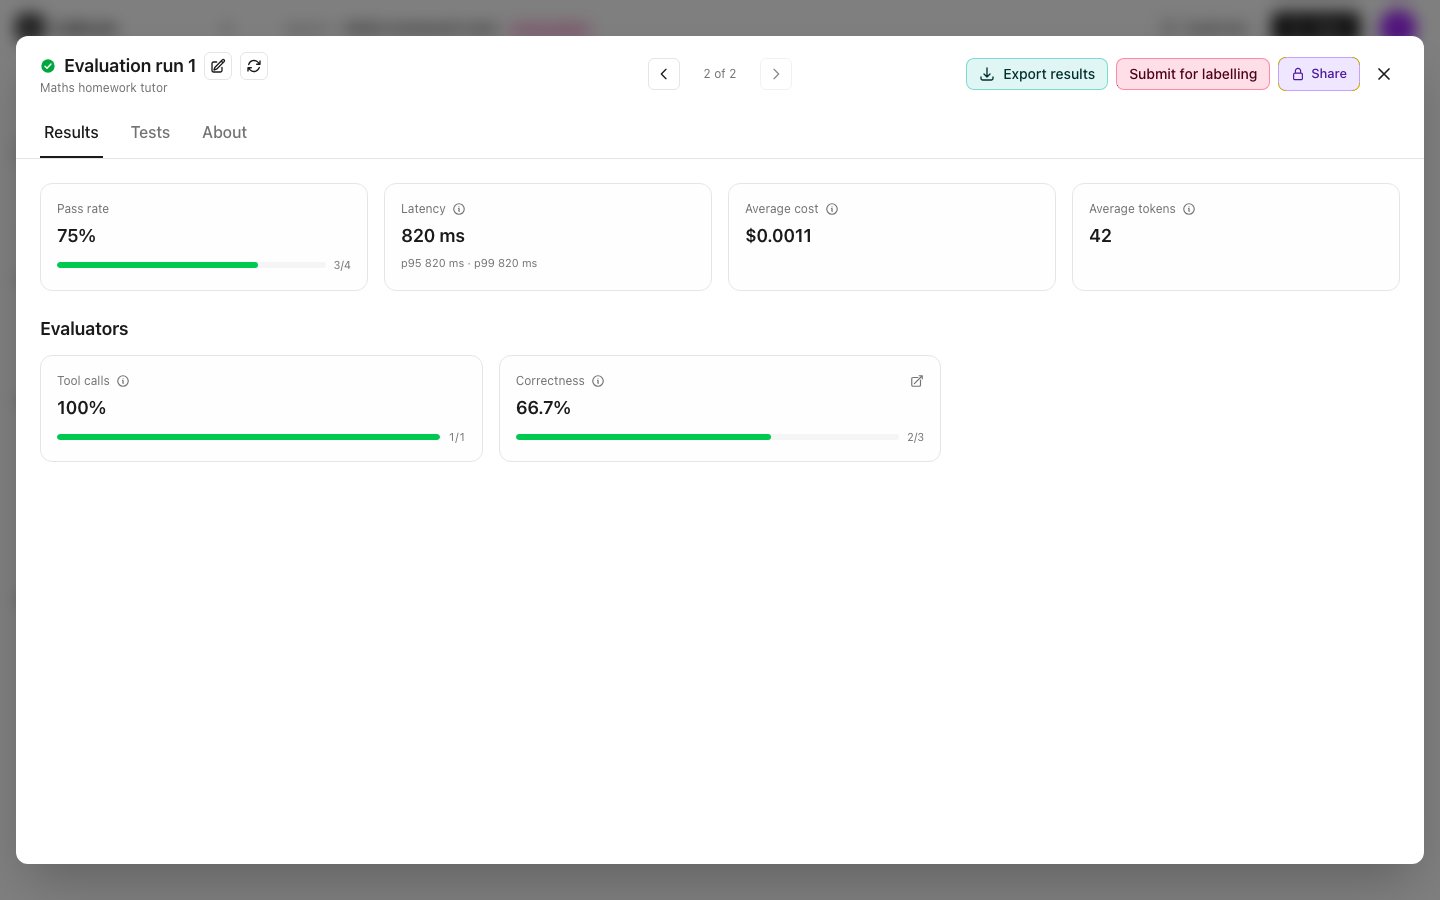
Share a public link
- Click Share at the top of the results window. The button changes to Public.
- Click Copy link next to it.
Check the evaluator with people
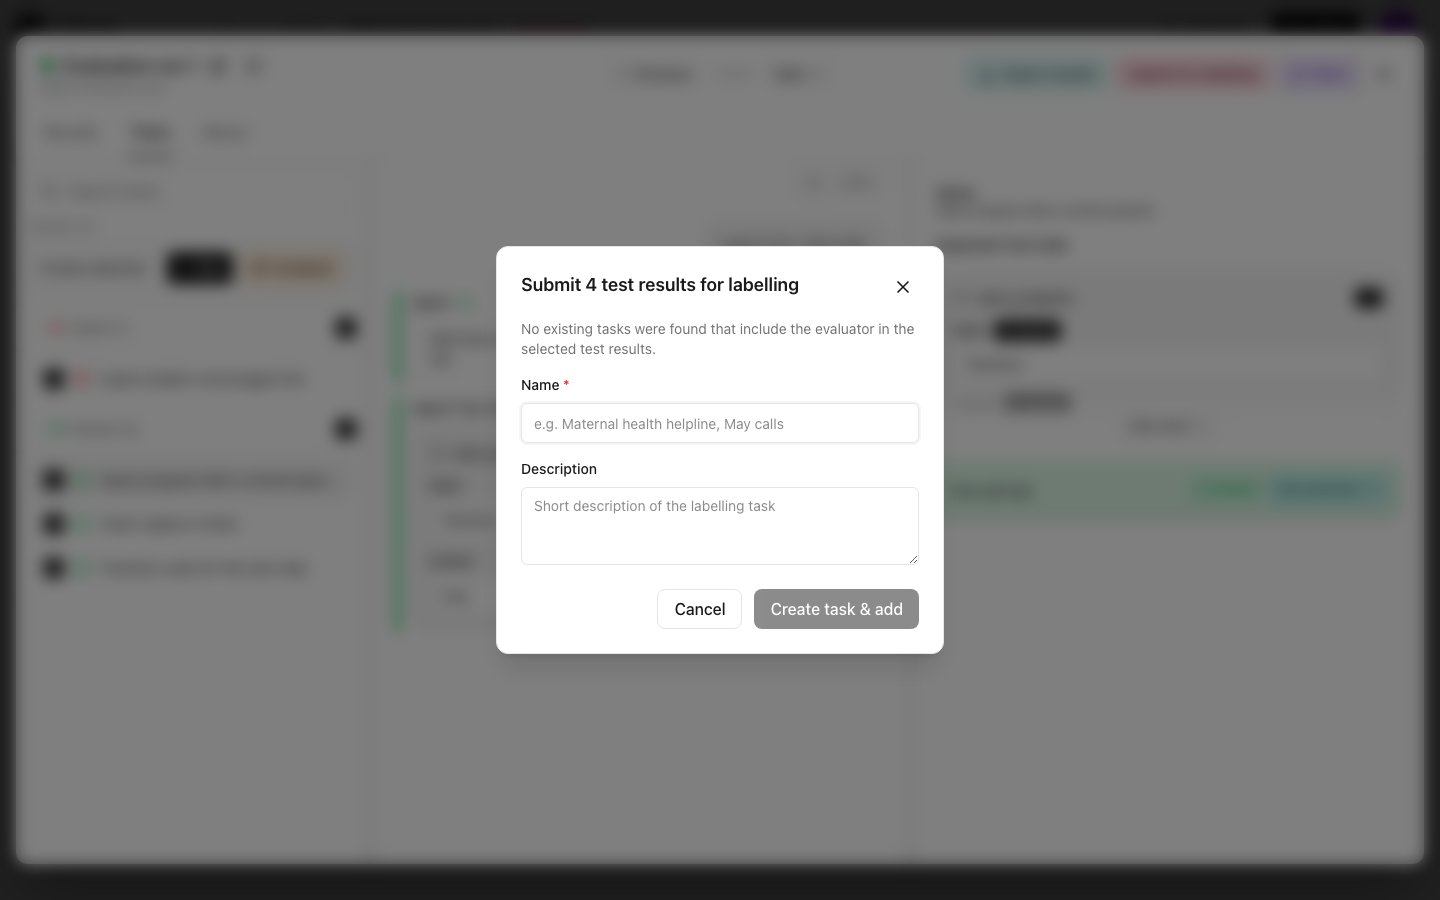
You can send tests to people who label them by hand. This shows whether the evaluator agrees with people.- On the Tests tab of the results window, tick the tests you want to send.
- Click Submit for labelling.
- Under Name, enter a name for the labelling task. You can add a Description.
- Click Create task & add.
Next steps
Compare models on your tests
Run the same tests on several models
Create an evaluator
Write your own evaluator for your tests